
Installing Your Rain Chain
To make the installation process smooth and trouble-free, follow the steps below.
Should you encounter any challenges, feel free to reach out to our team for assistance.
Step 1: Remove Existing Downspout
If necessary, detach the existing downspout (usually fastened with a few sheet metal screws).
Installation Kits
We highly recommend using Installation Kits as they help channel rainwater from the gutter onto the rain chain, minimizing splashing and improving functionality. They also ensure a more secure connection for your rain.
See below for installations kit instructions.
Installation Of V-hook or Installation Kits
Step 2: Use the V-Hook
A V-Hook will come with your rain chain for areas with minimal rainfall where water splashing is not a concern. Install the V-Hook that's (see diagram above. *If you purchased an Installation Kit, you can move on to the next step directly.


Installation Kits
-
Remove the D-Clip from installation kit
-
Confirm that your installation kit will fit in your gutter
-
Determine if extra flange is needed for your gutter opening
-
Spread silicone adhesive on flange
-
Drop the cylindrical outlet piece into your gutter hole
-
Connect your rain chain to the installation kit by the D-Clip
*If you are making a new hole for the installation kit, 2 1/4" is the correct diameter for a standard Installation Kit.

Step 3: Install your Link Chain Reducer
Install your Link Chain Reducer. If you didn't purchase a Link Chain Reducer, you can skip this section. Link Chain Reducers are mainly designed for use with Link Style Rain Chains. Their purpose is to direct the water that flows out of the Installation Kit onto the rain chain, allowing for better water flow and reducing splashing.

Step 4: Assembly
Put together your rain chain. For cup-style designs, the cups and top wires are usually separate for compact packaging and safer shipping. Install your Link Chain Reducer if you have one. Skip this step if you did not purchase a Link Chain Reducer.
Step 5: Continued Assembly
Complete the assembly of your rain chain, following similar instructions as in Step 3.
Step 6: Secure Your Rain Chain
Anchor your rain chain to the ground to prevent swinging in the wind, which may lead to damage. Here are some common methods:
-
Anchor Stakes or Pins: Use the Rain Chain Anchor Stake™ or Rain Chain Anchor Pin to secure the rain chain to the ground with the provided lightweight copper chain.
-
Dishes and Basins: Connect dishes or basins to your rain chain using the Loop-Kit and add weight with stones at the bottom for stability.
-
Underground Drains: Connect your rain chain to a drainage grate for water to flow away from your house through an underground drain, ideal for new constructions or professional landscape remodels.
Assembling Your Link Style Rain Chain
To assemble your link style rain chain, follow these steps:
-
Unpackage your rain chain links.
-
Locate the two slots in each link.
-
Connect your first two links by sliding the slots together.
-
Your first two links are now assembled.
-
Repeat the process until your chain reaches the desired length.
-
This assembly process applies to rain chains with individually packaged links, such as the Architectural Links, Diamond Links, Rectangle Links, Cast Oval Links, Cast Aluminum Droplet Rain Chain, and XL Cast Aluminum Oval Links.


Anchoring Your Rain Chain
To secure your rain chain and prevent it from swinging freely in the wind and potentially causing damage to your home or surroundings, follow these steps:
-
Utilize Anchor Stakes or Pins:
-
The Rain Chain Anchor Stake™ or the Rain Chain Anchor Pin provide excellent options for anchoring your rain chain.
-
Insert the stake or pin into the ground directly below the rain chain.
-
Connect your rain chain to the stake or pin using the lightweight copper chain included.
By anchoring your rain chain properly, you can enjoy both the aesthetic and functional benefits it brings without any concerns about potential damage.
Dishes and Basins
Explore our range of dishes and basins designed to complement your rain chain, easily connected using our Loop-Kit. This kit includes a length of lightweight chain that seamlessly attaches to your rain chain. For added stability, consider placing stones at the base of the basin or dish to provide weight. Enjoy a customized and functional rain chain setup with our diverse selection of dishes and basins.

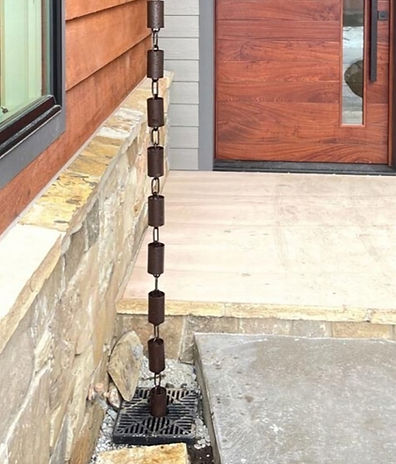
Underground Drains
Consider connecting your rain chain to a drainage grate as an alternative solution. The rainwater will be directed away from the house via the underground drain system. This method is particularly favored for new construction properties or those undergoing a professional landscape remodel. Opt for underground drains to efficiently manage rainwater runoff and enhance the functionality of your rain chain setup.